How to Turn a Bus Into a Tiny Home: Are you looking for a fun and creative way to live on the road, explore new places, or simply downsize your life? Turning a bus into a tiny home is a popular project for people who want to combine the adventure of travel with the comfort of home. While it may sound like a big task, it can be a fulfilling and rewarding experience. Here’s a simple guide to help you understand how you can turn a bus into your very own tiny home.
Awesome Tips: How To Turn a Bus Into a Tiny Home
1. Choosing the Right Bus
Before jumping into the conversion, you need to choose the right bus. When selecting a bus, consider factors like size, condition, and cost. Many people opt for retired school buses, as they’re sturdy and relatively affordable. Another option is a coach bus, which often has more space and is built for long-distance travel. The bus should have a solid engine, good tires, and minimal rust to ensure that it’s ready for your transformation.
2. Planning the Layout
Once you have your bus, the next step is planning the layout of your tiny home. You’ll need to decide how to use the space wisely. It’s essential to plan how you want to organize everything before making any changes.
Start by sketching your ideas on paper or using an online tool to create a floor plan. Think about where you’ll place the bed, kitchen, bathroom, storage, and seating areas. Since space is limited, it’s a good idea to prioritize essentials and use multi-functional furniture. For example, you could use a foldable table or a sofa that converts into a bed.
Also, think about the flow of the space. You don’t want to feel cramped, so plan for enough room to move around. Make sure to allow for space for windows to let in light and create an open atmosphere.
3. Insulating the Bus
Insulating the bus is one of the most important steps. Without good insulation, your tiny home will be too cold in winter and too hot in summer. There are several options for insulation, such as spray foam, foam board, or reflective insulation. Each type has its advantages, so you can choose based on your budget and climate.
Spray foam is excellent for sealing gaps and creating a uniform layer of insulation, but it can be more expensive. Foam board is affordable and easy to install but requires careful handling to avoid gaps. Reflective insulation is lightweight and great for reflecting heat, making it a good choice if you live in a hot climate.
4. Building the Interior
Now comes the fun part—building the interior of your tiny home! You’ll need to install walls, floors, and a ceiling, all while keeping weight and space in mind. You can use plywood for the walls and flooring, as it’s easy to work with and relatively lightweight.
When building the walls, you can add a layer of insulation before putting up the plywood. For the ceiling, consider using a lighter material like tongue-and-groove wood or paneling. You’ll want to avoid adding too much weight to the bus, so keep your materials simple and functional.
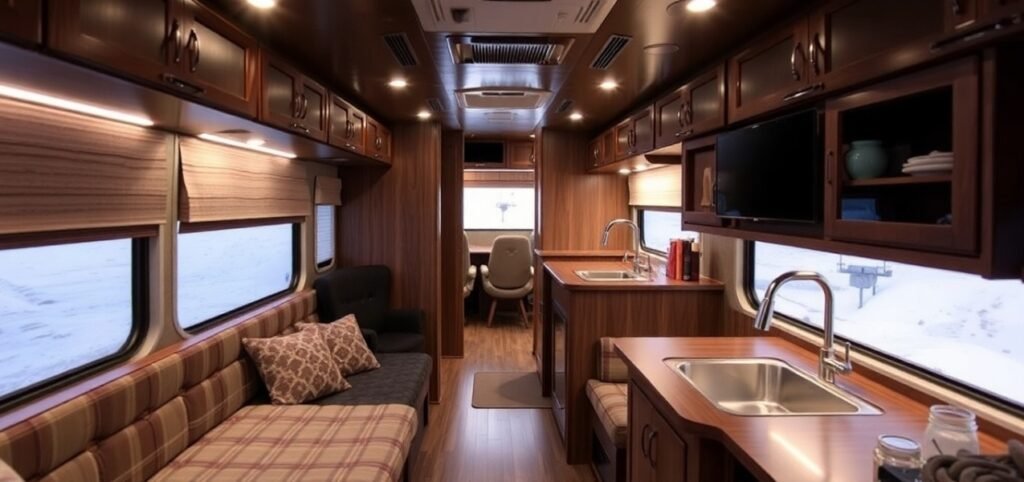
5. Creating the Kitchen Area
The kitchen is one of the most important areas in your tiny home, as it will be used daily. It’s important to have a functional and space-efficient setup. You don’t need a full-sized kitchen, but a small stove, sink, and fridge are essential.
You can install a small, compact kitchen with a two-burner stove, a mini-fridge, and a small sink with running water. Many people choose to go with propane or electric appliances that work well in a small space. Make sure you also have storage for food, utensils, and cookware.
If you’re short on space, consider using a pull-out counter or wall-mounted shelves that you can tuck away when not in use. Creative storage solutions like underbed storage or over-cabinet shelves can help you keep your kitchen organized.
6. Adding the Bathroom
A bathroom in a bus can be a bit tricky due to space constraints, but it’s possible. You’ll need to install a compact toilet and shower. Some people opt for a composting toilet or a portable toilet to save space. If you want to add a shower, a small corner shower stall will work well.
To save even more space, you can install a wet bath, where the toilet and shower share the same space. Make sure to add proper ventilation to prevent moisture buildup, and choose water-saving fixtures to keep things efficient.
7. Electricity and Plumbing
To make your tiny home functional, you’ll need to set up basic utilities like electricity and plumbing. For electricity, many bus conversions use solar panels, which can be installed on the roof. You’ll also need a battery bank and an inverter to store and convert solar power into usable electricity.
For plumbing, a small water pump and a freshwater tank are essential. You can use a greywater system to collect used water from the sink and shower. Make sure everything is properly sealed to prevent leaks and water damage.
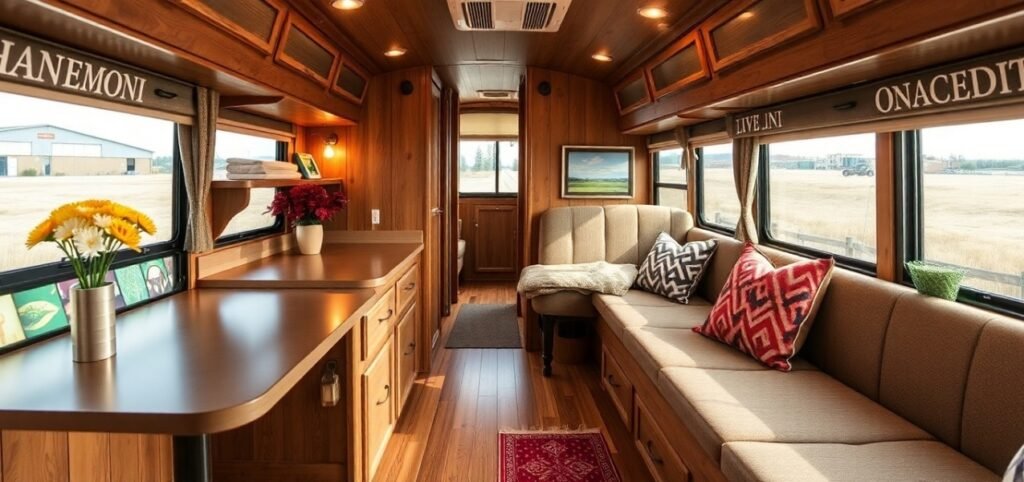
8. Furnishing and Decorating
Finally, it’s time to furnish and decorate your tiny home. Use lightweight furniture and multi-functional pieces that save space. Add cozy touches like curtains, rugs, and pillows to make the bus feel like home. You can also use bright colors or natural materials to create a welcoming atmosphere.
Add personal touches to make the space feel your own. Whether it’s artwork, plants, or unique decor items, make sure your bus tiny home reflects your style.
Conclusion
Turning a bus into a tiny home is an exciting and rewarding project that offers freedom and adventure. With careful planning, creativity, and hard work, you can transform a bus into a comfortable and functional living space. From choosing the right bus to building the interior and adding the finishing touches, each step brings you closer to your dream home on wheels.
Whether you plan to travel full-time, use it as a vacation getaway, or just downsize your living situation, turning a bus into a tiny home is an amazing way to live life on your own terms.